Create a Custom Table
Learn how to Create a Custom Table!
Table 15" or larger
OPTION 1 - NO POWER TOOLS REQUIRED
MATERIALS LIST
• Tabletop, shelving material or finished plywood approximately 24” x 24” (recommended)
• Table leg, screws (supplied with the table leg or #8x¾" long)
• Strips of wood ½" thick
• Wood glue
TOOLS LIST:
• Screwdriver
• A saw may be required
STEPS:
1. Measure to find the center of the table.


2. Remove the leveling foot from the table leg if required.

3. Place the leg on the center mark.

4. Using screwdriver mount the leg to the marked location using the #8 or #10 x ¾ “ long screws.

5. Use the strips of wood to accommodate for the thickness of the leg flange so the table doesn’t wobble. (In this example, we used inexpensive baseboard molding).

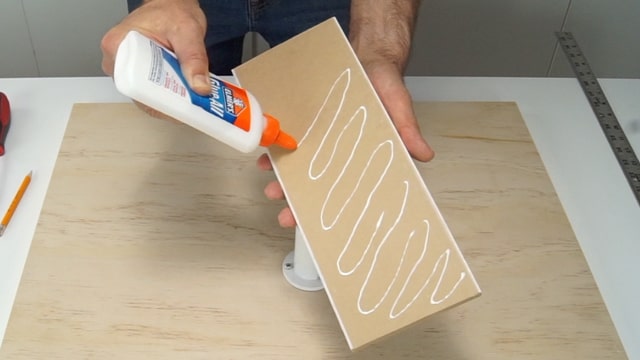
6. Glue the strips to the bottom of the table on both sides of the table leg.


Your table is ready to go!

7. Set up your Rail-EZ on the railing using the instructions provided and insert your table into the Rail-EZ holder.

8. Tighten the table assembly into the Rail-EZ holder.

9. ENJOY!

OPTION 2 - COUNTERSUNK LEG USING ROUTER
MATERIALS LIST:
• Tabletop, shelving material or finished plywood approximately 24” x 24” (recommended)
• Table leg, screws (supplied with the table leg or #8x¾" long)
TOOLS LIST:
• Screwdriver
• Router
• ¼” straight router bit
STEPS:
1. Measure to find the center of the table.


2. Remove the leveling foot from the table leg if required.

3. Trace around the table leg at the marked location.

4. Using the router, pocket out the marked area for the table leg deep enough to clear the flange thickness and the height of the screw heads.


5. Place the leg inside the routered pocket.

6. Secure the leg in place with the screws. NOTE: The screws should be short so not to protrude through the table material - ⅝” long is recommended.

Your table is ready to go!
7. Set up your Rail-EZ on the railing using the instructions provided and insert your table into the Rail-EZ holder.

8. Tighten the table assembly into the Rail-EZ holder.

9. ENJOY!

